How to set up Google Tag Manager on Flint pages
Last updated: May 20, 2026
You can easily add Google Tag Manager (GTM) to your Flint pages to track visitors and events. The recommended approach is to use the same GTM container ID as your main website, which allows you to track users across both your root domain and Flint subdomain.
Setting up GTM in Flint
Go to your Flint Site Settings
Navigate to the Scripts section
Add your GTM Container ID in the Google Tag Manager field
Click Save and Publish
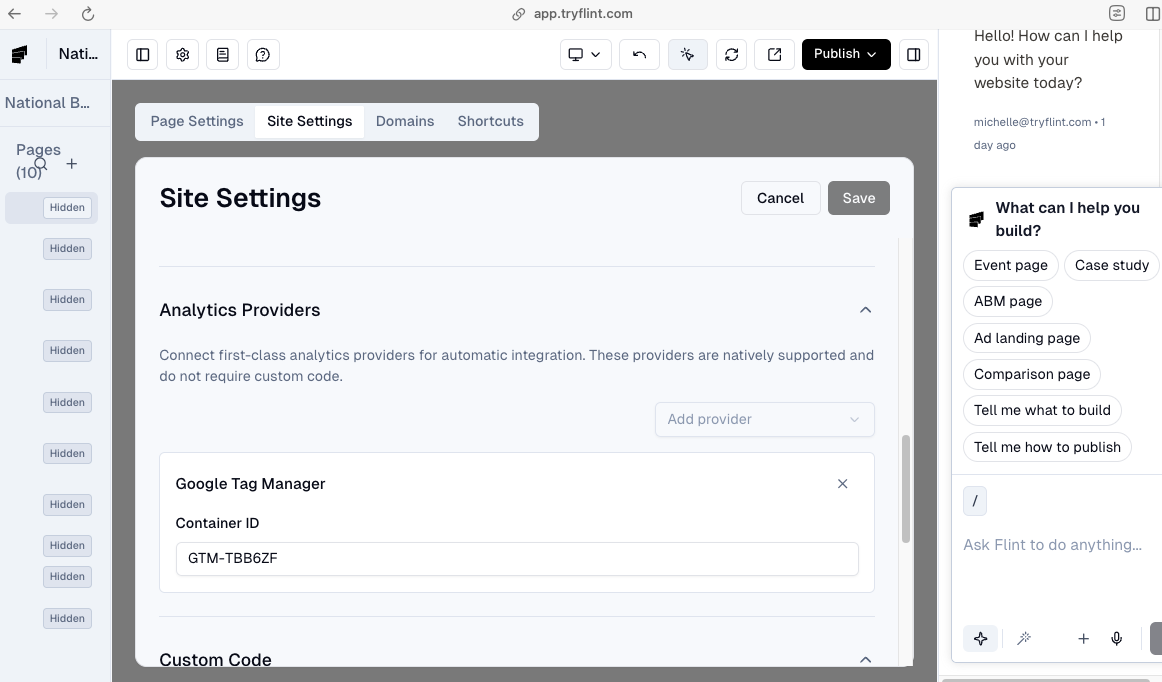
Once you add the Container ID and publish, Flint automatically injects the required GTM head and body snippets into every published page on your site.
Completing the setup
To ensure everything works correctly:
In GTM: Publish your container so your latest tags are live
Verify tracking: Use the Tag Assistant browser extension to confirm your tags are firing on published Flint pages
Check Container ID: If tags aren't firing, double-check that you entered the correct Container ID in Flint
Additional considerations
Custom domain setup: If you're hosting Flint on a subdomain, make sure to connect it in Site Settings → Domain.
URL parameters: Flint automatically preserves all URL query parameters (like UTMs, gclid, fbclid), so they'll pass through to your analytics without additional setup.
Custom tracking: If you have custom scripts or tracking events from your main site (like button tracking or specific payloads), you can copy the code into the Flint agent and it will set them up for you.
Troubleshooting
If GTM stops working after initial setup, try removing and re-adding your Container ID in the Site Settings. This has resolved tracking issues in some cases.
For more detailed information, check out the Flint Analytics documentation.